|
Company Address/Misc Options |

|

|

|

|
Expand the following to view details on each tab.
General
Allows you to setup and/or change your company information.
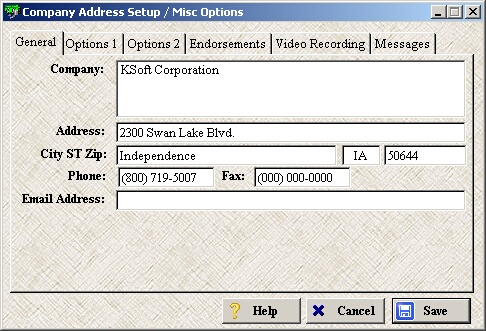
| » | Enter all the desired information about your company. |
| » | The company name and address prints on all reports. |
Options 1
Allows you to setup and/or change settings associated with cashing checks and miscellaneous sales.
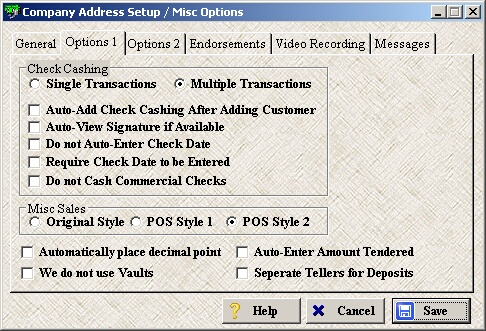
| » | Single Transactions: allows you to cash only one check at a time. |
| » | Multiple Transactions (default): allows you cash more than one check at a time. |
| » | Auto-Add Check Cashing After Adding Customer: pop-up window automatically appears asking "Would you like to cash a new check at this time?" immediately after adding a new customer. |
| » | Auto-View Signature if Available: if the customer has a signature on file (pulled from back of previously cashed check) the signature will automatically pop-up after any check is cashed by this customer. This allows you to compare the signature on file with the signature on the back of the new check. |
| » | Do not Auto-Enter Check Date: does not automatically enter today's date in the Check Date field when cashing a check. |
| » | Require Check Date to be Entered: requires a Check Date be loaded before the check can be cashed. |
| » | Do not Cash Commercial Checks: prevents business checks from being cashed. |
| » | Original Style: changes the look of the Misc Sale window (small pop-up window that does not use the Cash Out screen). To view complete details on this option, please see Using Original Style. |
| » | POS Style 1: changes the look of the Misc Sale window (full screen window without the QuickKey buttons but does use the Cash Out screen). To view complete details on this option, please see Using POS Style 1. |
| » | POS Style 2 (default): changes the look of the Misc Sale window (full screen window with the QuickKey buttons and the Cash Out screen). To view complete details on this option, please see Using POS Style 2. |
| » | Automatically place decimal point: assumes you will be keying in the cents portion of the check (ex: typing "5" results in $0.05). Otherwise you will need to key in the decimal point (ex: typing "5" results in $5.00). |
| » | We do not use Vaults: when you start a shift or end a shift, money will not be transferred to/from a vault. |
| » | Auto-Enter Amount Tendered: this feature only works if you are using the Original Style misc sales window. This automatically assumes the customer is paying the total due (no need to enter an amount tendered). |
| » | Separate Tellers for Deposits: with this option checked, the system allows each terminal (computer) to print its own deposit slips instead of one slip for entire store. |
Options 2
Allows you to setup and/or change settings associated with deposit slips.
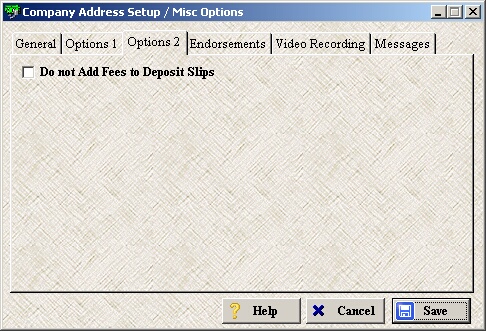
| » | Do not Add Fees to Deposit Slips: removes the section at bottom of the deposit slips that shows total fees charged for the day. |
Endorsements
Allows you to setup and/or change endorsements associated with cashing checks.
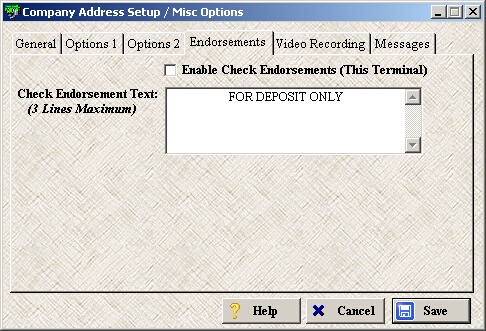
| » | Enabling Check Endorsements allows the selected text to be printed on the back of each check being cashed. |
| » | This only works if you have an endorsement printer. |
Video Recording
Allows you to setup and/or change settings associated with video recording check cashing and misc sale transactions.
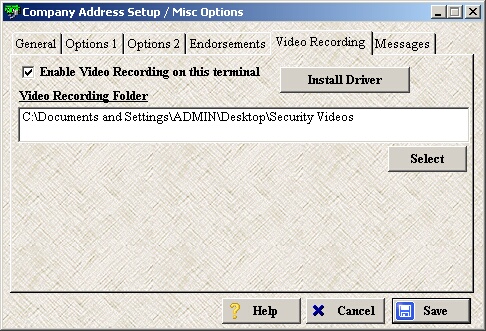
| » | Enabling Video Recording allows each check cashing transaction and/or misc sale to be automatically recorded via a webcam. To enable your webcam, please see Scanner/Equipment/MoneyGram Setup (Fingerprint/Webcam section). |
| » | Use the Install Driver button to install the driver, server, and setup the video recording software. To view complete details on this, please see Install Hardware Drivers (Video System section). |
| » | The Video Recording Folder is where all videos will be stored. Use the Select button to browse for a specific folder. |
| » | Once enabled, every time the a check cashing process or misc sale process is started, the recording automatically starts in the background and ends when the transaction is complete. |
| » | To view the video (only available for checks cashed), go to the Check Cashing Register and right-click on the customer then select Play Video Transaction. |
| » | You can also view the videos (both misc sale and check cashing) through the folder where they are stored. The videos are automatically named according to their Transaction ID. To determine the Transaction ID, please see Receipts. |
Messages
Allows you to setup and/or change messages associated with cashing checks.
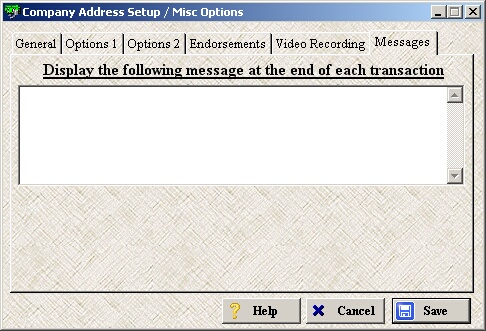
| » | This message will display in a pop-up window at the end of each check cashing transaction. |
Page url: http://www.ksoftcorp.com/help/index.html?company_address_misc_options.htm

